How to setup metamask wallet
Battle Infinity’s Beginner’s Guide to MetaMask Wallet Configuration
Note – Battle Infinity is the project name and IBAT is our token Symbol.
This is a beginner’s guide that will explain how to set up the MetaMask wallet so that you can safely buy and store IBAT tokens.
Quick Overview of MetaMask Wallet Configuration.
The following step-by-step instructions on how to set up MetaMask should be sufficient if you have some familiarity with how wallets typically operate.
- First, set up MetaMask Wallet on your browser. – Visit the MetaMask website in the first step, then select the browser you want to install the wallet on. The most popular choices are Firefox, Chrome, and Brave.
- Second step: make a wallet – Click the “Create a Wallet” option after installation.
- Third step: Create a password – You’ll be prompted to create a password right away. Ensure the highest level of security for your password.
- Fourth step: Write Down Recovery Phrase – The recovery phrase, which comprises 12 words, will then be displayed to you. These 12 words should be written down on a piece of paper and stored securely.
- Fifth step: Connect to BSc Network: MetaMask restricts your ability to conduct transactions to the Ethereum network by default. As a result, in order to interact with the IBAT token, you will need to manually enter the details of the BSc network. To get the required BSc network information, scroll down to our thorough, step-by-step instructions.
- Sixth step: Import IBAT Token: IBAT must then be imported into your MetaMask wallet. You may accomplish this by selecting “Import Tokens” and then pasting the IBAT contract address, which is listed below, into the appropriate field.
IBAT Contract Address: 0x19cd9B8e42d4EF62c3EA124110D5Cfd283CEaC43
Now that you’ve imported IBAT into MetaMask, you should be able to see the tokens you purchased during the pre-sale or through Pancakeswap.
In comparison to Trust Wallet, MetaMask is far more difficult to use. As a result, if you want a more extensive walkthrough, continue reading.
Step 1: Install MetaMask Wallet
As previously stated, MetaMask is accessible in two forms: as a mobile app and as a web browser plugin.
For the purposes of this article, we will outline the needed setup procedure while utilizing MetaMask through a browser extension. The technique is nearly the same when using the MetaMask app on iOS or Android.
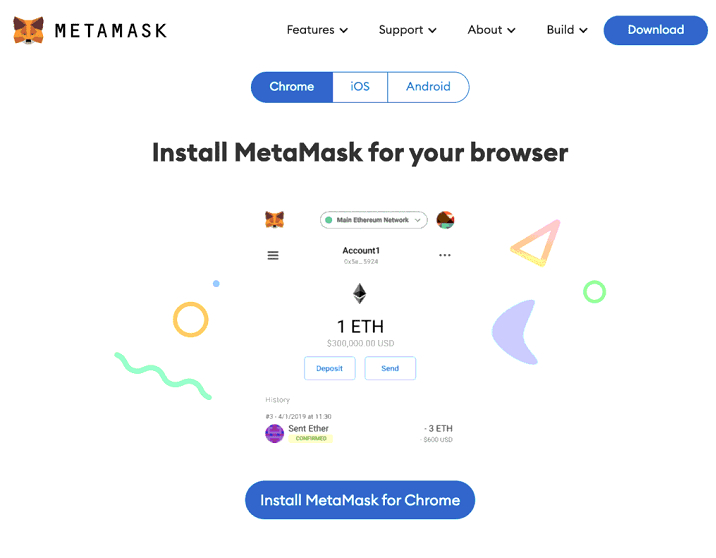
To begin, go to the MetaMask website and click on the ‘Download’ option. You will then be asked which web browser you want MetaMask to be installed on.
Most users will use Chrome or Firefox, however, Brave and Edge are also supported. Chrome is being used in this tutorial.
After installing the MetaMask extension in your selected web browser, click the ‘Create a Wallet’ option.
Step 2: Create a Password
You will now be prompted to enter a password. It’s preferable to use a combination of upper and lower case letters, numerals, and other supported characters to make this as long and diversified as possible.
Step 3: Note Down Recovery Phrase
This is possibly the most critical step, not least because you will now see your backup phrase. In a nutshell, this one-of-a-kind backup phrase consists of 12 distinct words.
If you, or anybody else, type these 12 words into MetaMask remotely, you will have immediate access to the wallet.
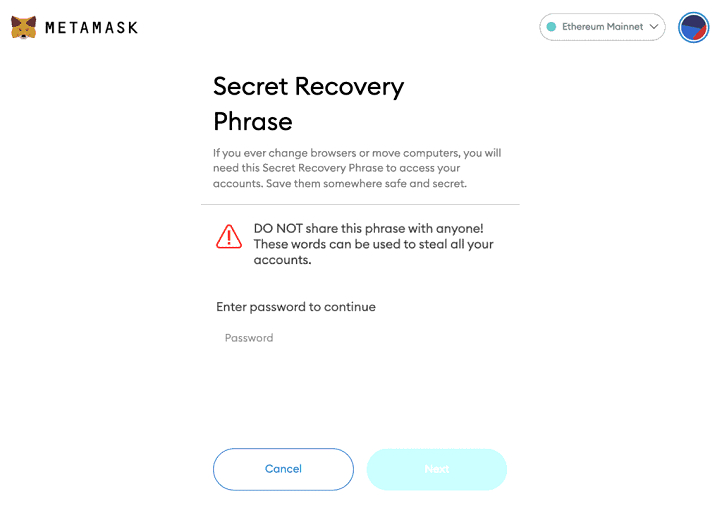
As a result, not only should you write down your recovery phrase, but you should also preserve the sheet of paper somewhere safe and secure.
More importantly, you must never reveal your 12-word MetaMask recovery phrase to anybody.
Step 4: Connect to BSc Network
The top-right corner of the screen in the image above indicates that MetaMask is connected to the Ethereum network by default.
In fact, when you initially install MetaMask, this is the only network to which you may connect. As a result, you will need to add the Binance Smart Chain (BSc) network to your wallet manually.
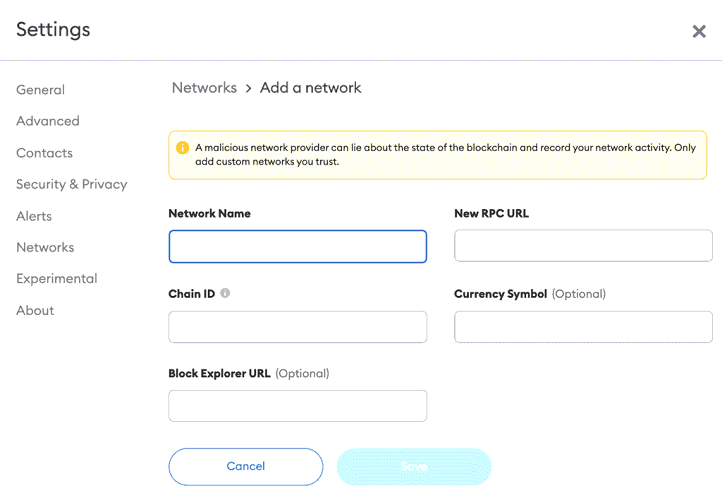
First, choose ‘Ethereum Mainnet,’ then ‘Add Network.’ Then, as shown on-screen, input the exact contract data.
The following contract information is taken directly from the official Binance website.
Network Name: Smart Chain
New RPC URL: https://bsc-dataseed.binance.org/
ChainID: 56
Symbol: BNB
Block Explorer URL: https://bscscan.com
Then, click the ‘Save’ button.
Step 5: Import Battle Infinity to MetaMask
After connecting to the BSc network manually, the next step is to import the IBAT token into MetaMask.
This will then allow you to buy and store IBAT safely and securely using MetaMask.
To do so, first ensure that you are connected to the BSc network’s main interface. If this is the case, your screen should look like the one below.
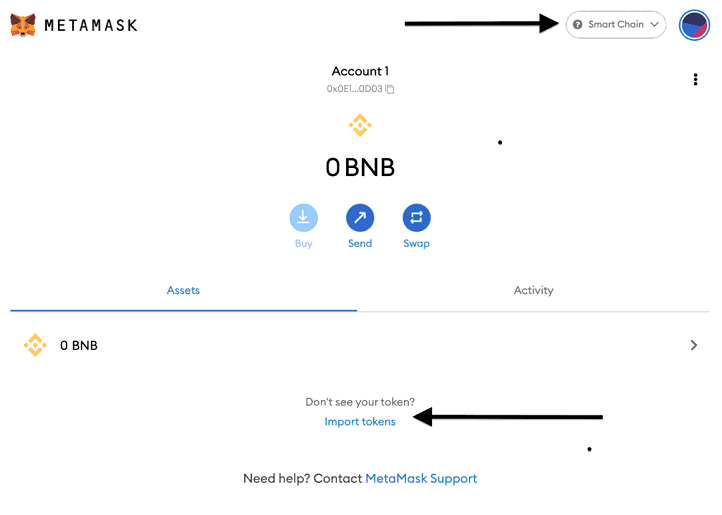
Then, select the ‘Import Tokens’ option. You must provide the unique IBAT contract address in the ‘Token Contract Address’ section.
See the IBAT contract address below for reference:
IBAT Contract Address: 0x19cd9b8e42d4ef62c3ea124110d5cfd283ceac43
The official Telegram group should be used to independently confirm the correct contract address. The blank fields should automatically populate and appear as seen in the following image once you paste the right address in:
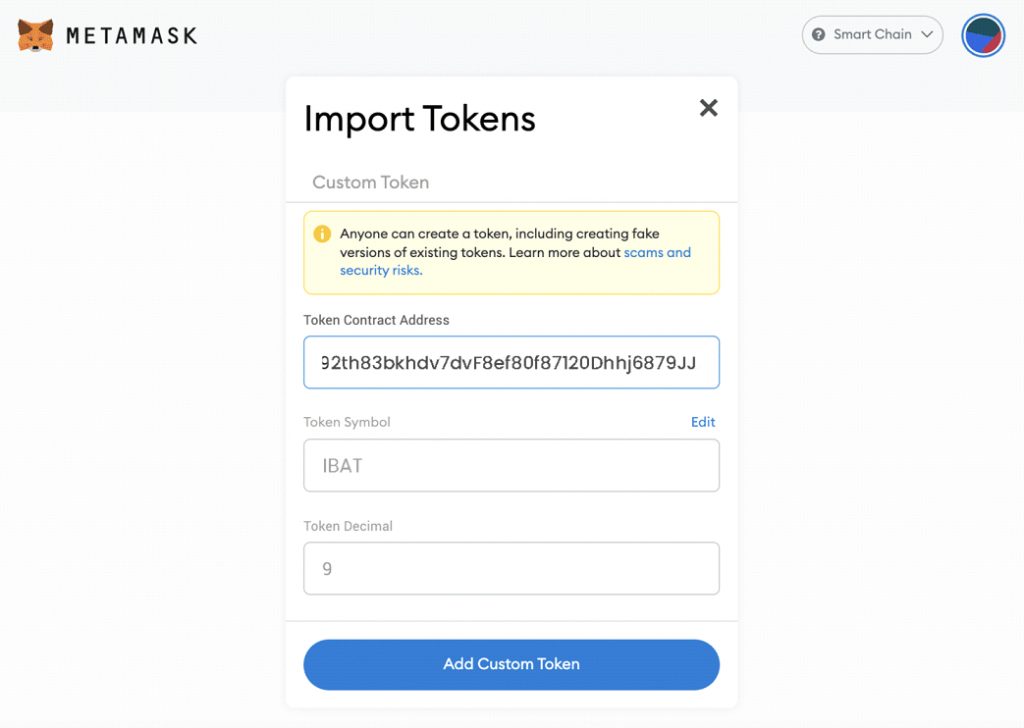
Next, click on the ‘Add Custom Token’ button.
Guidelines for Safeguarding Your MetaMask Wallet
Now that you are aware of how to install MetaMask and add IBAT tokens thereafter, it is crucial to understand that it is your duty to protect your digital assets.
Since MetaMask is a non-custodial wallet, you won’t have anywhere to turn if your private keys are compromised and your money is taken.
As a result, we provide some advice on how to keep your IBAT tokens secure when using MetaMask below to guarantee that you adhere to tight security protocols.
Tip 1: Strong Device Password
Make sure your laptop device is secured with a strong screen-lock password if you want to use MetaMask as a web browser plugin.
This implies that if your laptop is stolen or misplaced, it would be impossible for the person to access the browser where your MetaMask wallet is saved.
In the meanwhile, you might remotely encrypt your MetaMask wallet by using a separate device to enter your 12-word recovery phrase. Your Battle Infinity tokens might then be transferred to a new wallet address.
Tip 2: Secure Your Recovery Phrase
As previously indicated, in the event that your device is lost, stolen, or if you forget your password, your 12-word recovery phrase will let you restore access to your MetaMask wallet.
In either case, it’s critical that you save the piece of paper with your recovery phrase on it in a secure location.
You may even think about having two pieces of paper with six of your recovery terms on each. Then you may store each duplicate in two different places.
Tip 3: Be Wary of Other Browser Extensions
Examining the various browser extensions you have installed is another technique to guarantee the security of your MetaMask wallet.
Importantly, installing an unauthorized browser extension might give hackers access to your MetaMask wallet.
Tip 4: Malware and Phishing Attacks
Hackers will try a variety of methods to remotely access your MetaMask wallet.
First, malware is a popular choice for hackers and will cause the installation of a virus on your device. You could unintentionally click on a link that the hacker created, which could result in this.
Phishing assaults are also increasing in frequency in the bitcoin industry. Here is where the hacker will try to get your private data, such as your wallet’s 12-word passcode for MetaMask
For example, this may take the shape of an email purporting to be from a member of the MetaMask support staff. It might also emerge from a fraudulent counterfeit of exchange, such as Pancakeswap.
In any case, you should exercise extreme caution when selecting which links to click and which websites to visit.
The Last Word?
The goal of this beginner’s tutorial was to walk you through the whole process of installing the MetaMask wallet.
As a result, you should now understand how to acquire and keep IBAT tokens safely.
Finally, be sure to activate appropriate security measures on your MetaMask wallet, which will keep your IBAT tokens secure at all times.